12
02
2009
 This past Sunday I put the last couple trowel fulls of interior stucco on the walls in the kitchen! I have some photos from the day before showing the progress so far. Now we are on to some finishing work like seam filling, cleaning, trim and limewashing.
Click on the photo in this post to go to the updated Picasa album on the house construction!
Comments : No Comments »
Categories : Shire Strawbale Home
5
02
2009
 Well it’s been a long road, a hard road, felt like a lifetime to make it, but we are nearly done of stucco on the inside of the house! We have just the kitchen and utility closet left to put finish coat on and we can finally start cleaning up the dirt and filth and move on to finish work!
Soon, soon, our house will be done!
Read the rest of this entry »
Comments : No Comments »
Categories : Shire Strawbale Home
1
11
2008

We’ve started doing interior stucco and almost immediately ran into a few stumbling blocks. Number one was the fact that without horse manure in the stucco the mixer didn’t do as good a job mixing the product. Apparently the manure was acting to keep the clay in the mix from clumping together and when we tried to mis the stucco without it all we got was a mixer full of wet sand and hard clay lumps. We would then have to mix the resulting mess by hand, essentially making the mixer useless.
 The second issue was the straw bales were starting to mold after we applied slip to the wall. This was much more worrisome than the clay not mixing in. This was the inside of our house where our new born was going to be living and breathing, with mold on the walls! We theorize that there must be mold spores on the straw and that when the wet slip was sprayed onto the walls it gave the spores the moisture needed to bloom. And because we were spraying inside, and much thicker than we did outside it was taking a long time to dry. Laine did some internet researching and we decided to try spraying the walls with pure white vinegar. This seemed to kill the blooms and inhibit the mold from coming back. We also got two dehumidifiers to run full time inside and keep the wood stove going round the clock to help dry things out.
Read the rest of this entry »
Comments : No Comments »
Categories : Shire Strawbale Home
1
11
2008
 So what happened? Where have we been? Having a baby and working on finishing our house! on August 28th, 2008, 8:35am, Isobel Rayne Collier was born weighing 6lb14oz and was 21″ long. The birth took over 30 hours and I have never been more impressed with my wife’s strength and courage.
Izzy has been home with us now for a month and her and mom are doing very well, she is gaining weight and getting stronger everyday, I don’t doubt she’ll be walking soon! For those who know us and are l;ooking for photos, go see Laine’s facebook page, she does a photo of the day, usually involving Izzy in some way.
Read the rest of this entry »
Comments : No Comments »
Categories : Shire Strawbale Home
8
07
2008
 greenspree.ca » Blog Archive » Step Five – Stucco (Update)
We’ve made some progress on the stucco front! Check out the details at greenspree.ca.
Comments : 1 Comment »
Categories : Shire Strawbale Home
4
06
2008
CBC News Compass did a story on our house last week.
http://www.cbc.ca/pei/media/video/pe-strawhouse.ram
We’re stars! 🙂
Comments : No Comments »
Categories : Shire Strawbale Home
14
04
2008
I figure it’s time for a status update on the straw bale home. It’s been a slow 3 or 4 months since the snow started back in November, other than the interior walls, the plumbing and electrical rough-ins and a few small items we haven’t done much on the house.
A few weeks ago we had the main ventilation shaft and fan installed and will now be able to go ahead with insulating the attic! We ordered the wood for the second story ceiling and the danish oil finish for it. Two weeks ago we spent the long weekend cleaning my father-in-law’s shop and laying out and pre-finishing the wood for the ceiling. The danish oil was a labour intensive finish for 2400lnft of 1×5 t&g pine but it was fantastic to be able to use this non toxic finish without wearing masks. We also completed a last few niggling attic chores like vents for the bathroom fan, dryer and fresh air intakes.
Read the rest of this entry »
Comments : No Comments »
Categories : Shire Strawbale Home
12
02
2008
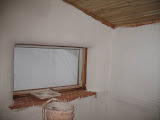
 Look! a water tank and electrical panel! We had the mechanical and electrical rough-in work started in December. The tiny “utility room” got tinier with the addition of actual equipment.
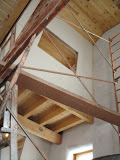
 A look from the utility room into the future kitchen. Note the plumbing and wiring in the ceiling! The bathroom is just above the kitchen and we are going to install a drop ceiling in this area. Also note the exterior steel insulated door leaning up against the wall in the background, this is the back door out to the yard waiting to be installed.
Read the rest of this entry »
Comments : No Comments »
Categories : Shire Strawbale Home
30
01
2008
It’s been a while since we updated with some photos so here we go. Later this week we’ll upload some photos of the M&E rough-in’s so far and some more interior work that has been done. Winter, the holidays, a new job, and finding out we are expecting has caused a bit of a slow down in work on the Shire Home, but we hope to get back on track soon!
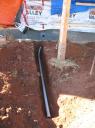 Before rough backfilling could begin around the house conduit had to be laid to run the underground power into the house. Because of the overhang and supporting post footings this had to be dug by hand. A 20 foot trench three feet deep doesn’t sound that bad till you have to dig it yourself
 Here the dozer is spreading out loads of fill over our septic field. Instead of hauling in loads of fill from elsewhere we got it from my wife’s sister’s lot next door where they were wanting to dig a pond! It saved us money on fill and they got the pond they wanted for free!
Read the rest of this entry »
Comments : No Comments »
Categories : Shire Strawbale Home
17
12
2007
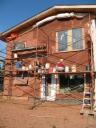
 Time for an update on the house! “Step Five – Stucco” has been started but put on hold! We got caught by the cold and snowy weather and the fact that we were relying on hoses run from my sister-in-laws house for water to make the stucco and only managed to get two walls covered with the discovery coat. We tarped the exterior as well as we could and are going to concentrate on interior work for the time being.
Speaking of interior work, here is what we have gotten done since the last update on stucco. We bought and installed a second hand wood stove (yay heat!). The stove is a Lakewood “Unicorn” model that was produced in New Brunswick. It’s called the “unicorn” model because the cast iron doors on the front of it have unicorns cast into it. It’s a catalytic stove and there is next to no info on it on the web. We are learning it’s quirks and are grateful for the amount of heat it gives of and the blower that came with it that circulates the heat nicely.
Read the rest of this entry »
Comments : 2 Comments »
Categories : Alternative building, Shire Strawbale Home


