Chest Fridge Update

13 07 2011

So after living in the strawbale home for a year and a half I realized that I never posted the results of one of themost talked about and controversial aspects of our plans, the chest fridge!

From chest fridge

Here is the fridge, it’s a 10.5 cubic foot (actual dimensions, it’s labelled a12 cubic foot) and has a Brewers Edge temperature controller attached:

From chest fridge

I’ve attached a Kill-a-Watt meter to it for the last 8-9 days and measured the consumption:

From chest fridge
From chest fridge

2.36KWH in 205 hours works out to be about 100KWH per year.  Compare that to my previous research that suggests a comparable upright refrigerator of the same size would use about 350KWH and you can see it has made a difference in our energy bills.

From chest fridge

Inside you can see that it is about as full as a comparable sized upright fridge and we find the usability to be about the same as a regular fridge.  We do put in a damp rid type product (Calcium Chloride) and have to clean the fridge about as often as a regular one.  Here is the damp rid tray:

From chest fridge

Alsmost time for a refill!  You can see some rust from the first couple weeks we were using it and didn’t use the damp rid in it, since then we haven’t had any problems!  We also have a 15 cubic foot freezer in the utility room/pantry for freezing things.

In our Energy market 250KWH a year is about $35, not exactly a lot of money, but every decision we made like having switched outlets to reduce ghost loads, drainwater heat recovery system to reduce the amount of electricity the hot water heater uses and CFL and high efficiency halogen lighting all add up to a good amount of savings per year.


The Backyard

5 08 2010

IMGP5156.JPGOur yard has been a bit of a dilemma for us these past few years.  Our land is 2.6 acres and mowing the whole thing was never an option although the first year we mowed about 2/3’s of it.  This year we have reduced the amount we mow considerably.  The reasons are many but primarily we want to spend less time mowing the lawn and less energy too.  We recently purchased a reel mower and are attempting to go gas free with our lawn.  It’s hard, but not as hard as you would think, and I rather enjoy the exercise.  We sometimes revert back to the old ride on mower when the grass gets too high for the reel mower and the trails through the wild parts of the lawn are sometimes easier to cut on the ride on as well.

As the season passes and the meadow area of the lawn grows it is interesting and beautiful to see all the different kinds of plants growing in it.  By far the most apparent plant right now is goldenrod, but there are others too, thistles, vetch, daisies, and some I don’t know.

Read the rest of this entry »


Straw Bale Home Building Primer

17 12 2009

IMG_5788.JPGReposted from greenspree.ca

So you want to build your own straw bale home. You’ve seen them in green home building books and on TV shows, you saw green home builders wax poetic about their homes low impact on the environment and connection to the local ecology. You’ve researched all the possible alternative home building techniques and the thought of conventional framing makes you shudder. You are going to build a straw bale home no matter what obstacles the MAN and doubters have to say! Well far be it for me to try and dissuade you!

There are some things you should know and experience first though. This, in all likely-hood, is going to be one of the most challenging things you will ever take on. Unless you are an experienced home builder, and maybe even if you are, building a straw bale home on your own is a daunting task from your POV and you are probably underestimating almost every aspect of it right now. You are underestimating the time, cost, effort and patience it will require. There are some things you need to realize before you start and some things you will not be able to realize till you do it for yourself.

If at all possible try and volunteer or take a course on straw bale building, and if you can participate in EVERY stage of building! Even if you think you don’t need to experience the finish carpentry parts of building a straw bale home because the bales are all done at that point, you should! Having uneven, lumpy and delicate walls makes every other step afterwards more difficult.

Doing a one day or even weekend workshop is not going to give you a feel for what the sustained level of work and care is required to construct a bale building of any size. Workshops and seminars are usually scheduled on dry weekends complete with large groups of volunteers and people who have done this many times organizing things and solving problems for you. You on the other hand cannot count on sustained levels of volunteer labour to help you finish your house, if you are lucky and well liked you will probably be able to convince friends and family to attend 2-3 work parties over the duration of the project, the rest you will be doing on your own.

You will spend an unimaginatively large amount of time tarping and untarping your house as you deal with weather unless you live in a desert. You will become attuned to the weather in a way only our pioneer/farmer forefathers were, you will constantly assess how much time you think you will have before bad weather rolls in on a given day and the time it takes to tarp you work for the day. You will buy more tarps than you think is possible, start looking for sales on them NOW!

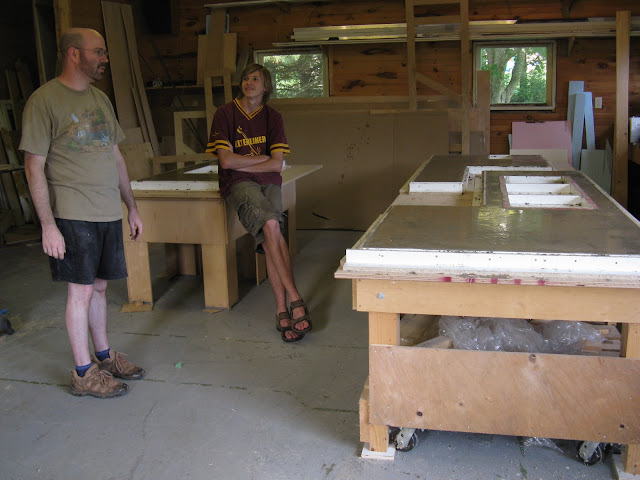
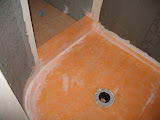
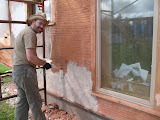
Unless you are an expert on natural plasters, you’ll need to at least use lime in your stucco/plaster mixes if not portland cement. Earthen plasters may be romantic and extremely eco-friendly but a leaky, rotten bale wall isn’t exactly a sustainable building practise! If you can, hire experts for this step, it’s one of the most critical components of your house and by far the most time and labour consuming one. If you do your own stucco, buy a mixer and start collecting buckets of every size and shape you can.

Speaking of tools, here is a list you should seriously owning:

  • scaffolding – Enough to completely cover one side of the house minimum! You can always sell it afterwards and if you are doing your own stucco the time frame you will be renting scaffolding for makes buying a much more affordable option.
  • compressor -From spraying slip on bales, nailing trim and blowing straw dust out of your other tools, you will use this every day!
  • chain saw – Cutting bales without one isn’t really feasible.
  • concrete mixer – as romantic as mixing stucco in a pit with your feet sounds, mixing literally tons of stucco is a lot more realistic mechanically!
  • common home-builder tools – you should have the basic tools used on any construction site: corded and cordless drills, circular saw, recipricating saw, jigsaw, table-saw, chop saw, hammers, levels, squares, chalkines, snips, pliers, screwdrivers, chisels, prybars, saw horses, etc, etc, etc

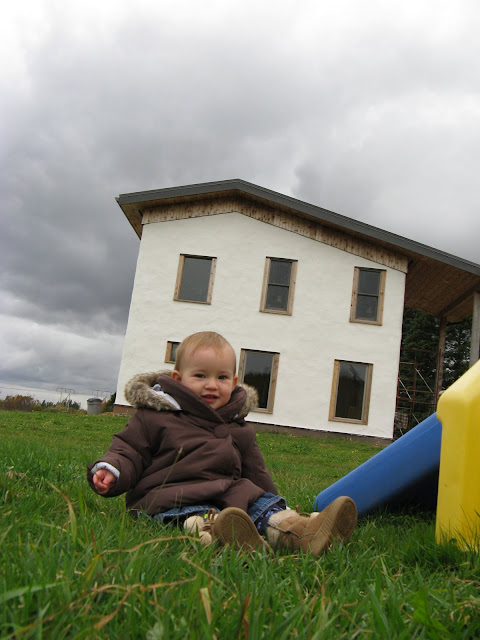
I naively estimated I would finish my house in 6 months working evenings, weekends and with 4 weeks vacation. I am not a builder but have construction experience, had help from a long time carpenter and lots of friends and family. Two years later we limped across the finish line (more on that below). Easily the biggest area of time and labour was spent on stucco, tarping and untarping walls, erecting and moving scaffolding. If you choose to subcontract any part of the building this is the part I would strongly suggest you leave to the experts. It is the most important part of keeping moisture out of your house, which of any building technique is the most susceptible to water damage! If you live in an area where there are companies with experience stuccoing straw bale I would definitely recommend hiring them!

This is a small list of the major hurdles and challenges of building your own straw bale home, the main thing you should remember is to remain flexible and adaptable, learn how to problem solve and think creatively. Take things one step at a time and remember that the hard work is part of the journey but completing the house isn’t the destination, just another road marker. If you spend the whole time thinking of the end as a finish line you’ll burn out. About half way through I had to stop dreaming of the day we’d be done and focus on the moments we were creating being builders. We weren’t enjoying the process anymore and the whole thing felt like a massive burden.

When I was able to accept that this was just a phase of my life that would last some unknown length of time and only carry the burden of the task I set out to finish that day/hour/moment was I able to set down the burden of the project as a whole and enjoy life again. It was still a struggle not to slip into the old way of thinking but I got a lot more done and felt a lo better if I could set that burden aside.

IMG_4613.JPG

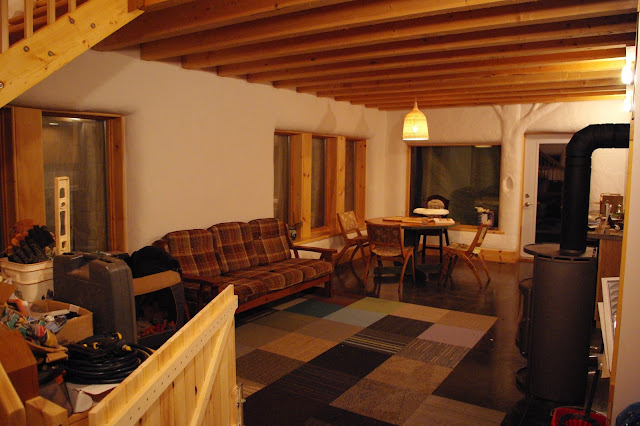
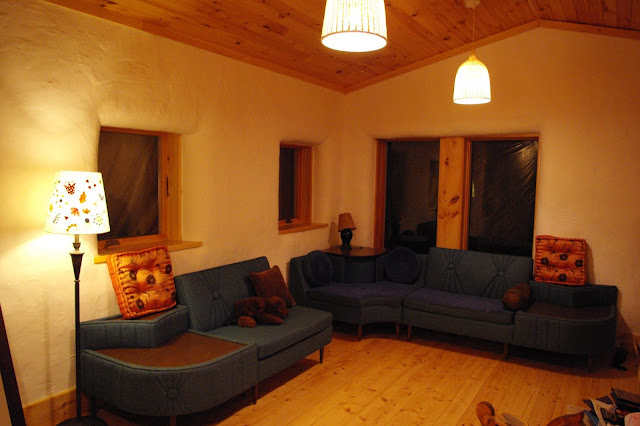
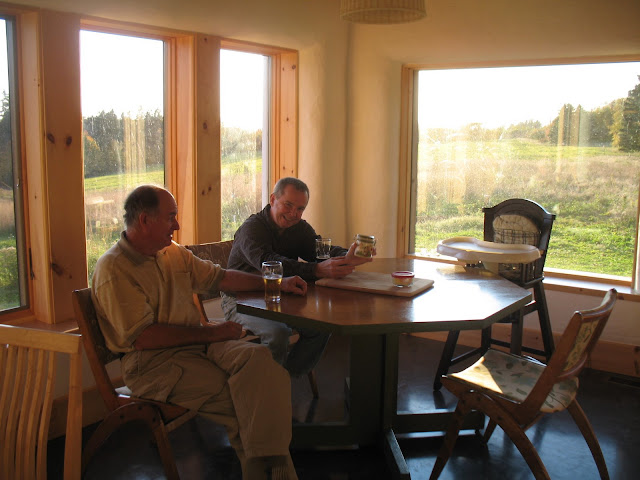
When you are done (for the moment, there are always future projects for a home owner!) take the time to enjoy your home and sit back and take it in now and then!


Last Few Months at the House

6 11 2009

Finally I have gotten round to getting some photos uploaded! We are officially moved in, the mortgage has been completed, and we are “done”, although I don’t think the work will ever stop! There’s some niggly trim work to complete, a few touch-ups, there will be on-going stucco maintenance and inspections, fire wood to cut and split, a wood shed to build, the storage/garden shed to finish and organize, an addition in the next couple of years probably, landscaping, a garden or two, walkways, decks, etc… But for the next little while we are going to take it easy and enjoy a little break!

Enjoy the photos!

IMG_3889.JPG Forms for the concrete countertops. Keith wanted to try his hand at concrete countertops and we volunteered as the test case!

IMG_3894.JPG No photos of the pour itself, we were to busy trying to keep ahead of the setting concrete to take photos. Keith, Cayden and I did the pour in a couple hours or so.

IMG_5596.JPG Here are the kitchen counters in place after a nervous truck ride up from Keith’s shop, no cracks from transport though!

IMG_5606.JPG And here is the bathroom vanity with it’s top. I made the vanity from leftover cedar lumber we had.

IMG_5608.JPG The bathroom shower fully tiled and grouted, it’s one of my favourite parts of the house now!

IMG_5766.JPG Izmo on our bed the first night we stayed at the house, she was pretty amused to see our bed here in what had always just been “that place Dad spends his evenings…”

IMG_5788.JPG Fixing stucco, we switched to lime stucco last fall and the areas where we simply went over the old caly finish coat it didn’t adhere as the clay was too smooth. So grooves were scored in the underlying clay for the lime stucco to key into.

IMG_5801.JPG Kitchen counter-tops ready for carnuba/beeswax/oil finish

IMGP2178.JPG The kitchen nears completion!

IMGP2180.JPG Couch is brought up and instantly makes the house feel like a home! Note the pile of tools still in the foreground.

IMGP2181.JPG Stove and fridge are in place!

IMGP2182.JPG As well as the dishwasher and coffeemaker!

IMGP2190.JPG The funky blue sectional gets set-up too!

IMG_6266.JPG Thanksgiving dinner at our place, I filled up our firewood nook for the day although the cooking and number of people made having a fire unnecessary that day!

IMG_6267.JPG Debie and Izzy chillin on the couch.

IMG_6270.JPG Dad and Keith having a drink and waiting for supper. (Ignore the dirty windows!)

IMG_6276.JPG We had two tables set up for extra mouths to feed for Thanksgiving.

IMG_4613.JPG Izzy outside the house, at this point we have just the north wall to paint. The wall facing the camera in this photo was done first and has held up to at least 4 hard rains with wind since being finished, so far so good.


House Progress

15 07 2009

It’s been a long time since I did an update on the house. No, we are not moved in yet. No, I don’t know when we will be moving in. But I hope very soon.

The electrical work is 99.99% complete.
The light fixtures are all installed and working.
The stairs are in and the railing is up but still needs balusters installed.
The cedar bathroom vanity has been built (from scratch by me!)
The kitchen cabinets are installed, the cabinet doors are half done and drawers and countertops are starting soon.
The window trim is 90% done.
The interior doors are just under half done.
The baseboards are about 20% done.
The washer and dryer are in and working!

Here are some photos from Canada Day of the lights after they were installed. Link to Picasa album with larger photos.

IMG_4457.JPG

IMG_4452.JPG

IMG_4459.JPG

IMG_4479.JPG

IMG_4466.JPG

IMG_4467.JPG


Stairs

19 05 2009

IMG_2500.JPGWe finally have stairs! The weekend before last we put in the stairs that have been laying in pieces in our kitchen for about a year! We still need to build handrails and re-sand and finish them after being exposed to clay dust for months but it’s nice to be able to go up and down stairs with using a ladder or scaffolding.

The impetus to get the stairs done was the impending delivery of the washer and dryer which were going up stairs, we didn’t think they would haul it up our scaffolding for the $47 delivery fee.

IMG_2279.JPGThe other areas getting closer to being done are the bathroom and window trim. With the scaffolding being removed we put on a push to get the stairwell window trim done. We finished the trim, sill, sill edge and then blended the stucco into the new trim. The new lime stucco used to blend the windows was painted with two coats of Quartzguard paint.

The bathroom floor tile and half the wall tile has been laid, grouted and sealed in preperation for the installation of our toilet and bathtub tomorrow by the plumbers. They will also be roughing in the shower fixtures, installing the hot water heater and drainwater heat recovery unit. The only plumbing left after that will be installing the kitchen and bathroom sinks and dishwasher line. The tub, toilet and shower installation will allow me to finish the kitchen ceiling below the bathroom which will then lead to the cabinets being installed!

We are on track for a June-ish completion date of the interior and that will leave a few weeks of exterior touch-ups left before we are completely done!


Tile and Window Sills

14 04 2009

This long Easter weekend we have focused on the window trim, bathroom tile and later on today concrete floor finishing. The windows have all their birch plywood sills cut, installed and finished finally, and there are 8 windows boxed out with trim on the first floor. Only 6 to go on the first floor and 13 on the second!

IMG_1560.JPG

The first step to cutting the plywood sills was to cut a piece of cardboard of cardstock or paper to the depth of the sill.

IMG_1561.JPG

Second a compass is set to the widest part of the curved stucco wall the plywood sill is to match up with, which in the case of our windows was the front edge.

IMG_1562.JPG

Start at the wood stucco stop…

IMG_1563.JPG

And keeping the compass parallel with the edge trace to the front.

IMG_1567.JPG

Cut out the template and test fit and trim as needed, then you can transfer the pattern to the plywood sill! Do this for both sides and then measure the narrowest point (at the stucco stop) and places the templates that far apart on the sill.

Of course some of the sills fit better than others and the slight gaps will have to be trimmed somehow (maybe rope, maybe with drywall compound and paint…) but all in all the sills turned out great!

IMG_1896.JPG

IMG_1895.JPG

The tile in the bathroom was started yesterday as well, with keith doing half the bathroom in the morning. The large 12″ x 24″ tiles look great and we can’t wait to grout and put our tub in place!

IMG_1899.JPG

IMG_1901.JPG

Hopefully, the window trim will be done by the time I go back to work on Thursday!


Open Stairwell

31 03 2009

IMG_1576.JPG Notice the distinct lack of scaffolding in our stairwell! We finished the trim at the top of the stairwell and were able to take the scaffolding out last week. The scaffolding has been there for basically a year so it’s a pretty big milestone!

IMG_1575.JPGWe also have a very large pile ($1000+ worth) of knotty pine board which have been ripped, routered and sanded to form our window trim, door trim and wall trim and are now going through the process of being finished with Danish oil. Having a kitty in the house complicates things as we end up with dusty little footprints on the trim if we don’t keep the trim covered up. Hopefully the floors will be cleaned up soon so she doesn’t have dirty feet anymore!


Shower Stall

15 03 2009

IMG_1457.JPG Today we finished painting the bathtub (sorry no photos) and putting in the waterproof membrane in the shower stall. The cement board was installed last week and the new cedar ceiling on Saturday so the only thing left to do to get the bathroom ready for floor tiles was to install the membrane. We’re leaving the wall membrane till later as the plumbing for the shower fixture needs to be roughed in yet and we aren’t getting the plumber back till we have the floor tile done and tub in place, sort of a chicken and egg thing.

We have also sanded, planed and routered the baseboard for the chase and applied two coats of danish . We will be adding a coat of carnuba wax on top of that and they’ll be ready to go on. We have definately turned a corner to finish work on the house, tomorrow evening I will be picking up the finish paint colour and some more trim, and this week some serious cleanup action will happen so we can work with the trim in a clean environment!

Here are some more photos of the shower stall, imagine the floor with tumbled hexagon tiles, the curved wall with polished hexagon tile, the flat walls with polished rectangular tile, and the floor outside the shower with 12″ x 24″ tiles. Hopefully the floor tiles will be installed next weekend!

Read the rest of this entry »


Cement floors and cement board

12 03 2009

IMG_1204.JPGThings are progressing at the house and really starting to take shape, especially after taking a night to clean the bulk of the dirt and mud that was on the floors downstairs! When the floors are wet they look fantastic, almost like polished black marble and hopefully when polished and waxed they will keep this appearance.

IMG_1205.JPGIMG_1206.JPG

You can see the wall behind the woods tove is finally in, the stove pipe is just disconnected while I put a skim coat over the cement board so it will look as smooth as drywall. There is also a tall narrow cubby for fire wood and a shelf for our backup electric utility heater for when we are away from home for extended periods of time. The back of the firewood cubby will have a removable panel to access the back side of the fan unit in the utility room as well.

IMG_1207.JPGUpstairs we are finishing up the cement board work in the bathroom so tiling can begin this weekend, the shower and bottom 3′ of the walls and floors all being tiled. The curved shower wall was abit of a challenge but we found that 1/4″ cement board will bend around the radius we had as long as you eased it into it (which needs at least two sets of hands!) Our EPS foam premanufactured sloped shower base was maybe installed a bit too soon in the process and despite our best efforts to protect it has seen a few dents and dings along the way, hopefully this won’t be too big an issue after the waterproof membrane is installed over it.

IMG_1210.JPG

IMG_1213.JPG

IMG_1215.JPG

Wiring for the house has been progressing as well with lights being wiring and plugs activated in the past few days. Upstairs we are getting ready to install the living room ceiling lights and hanging lights over the stairs. Haste in putting in the ceiling led to some gaps that the light fixture bases couldn’t hide so we had to make some wooden “escutcheon” plates to make up for that.

IMG_1216.JPG

IMG_1218.JPG

We are hopefully selecting finish paint colours for the house and starting finish paint, tiling and finish trim this weekend! The progress on the house seems much faster now that we are past the stucco stage that I wish I could take time off to work full time on it again but I must be content with 3-4 hours a night and weekends for now!